Thursday, November 29, 2007

iPod Hacking


Ever since I first wrote Grip and DigitalDJ back in the late 90's, I have always maintained my own software for managing my digital music collection. My current incarnation is a C# application with a WPF user interface and a custom streaming server that sends music to my Xbox running Xbox Media Center.

My music lives on a linux box in my office closet. Since I am soon going to be traveling extensively, I needed a way to get my music portable. I had an 80gb iPod still in the shrink-wrap from company xmas present excess when I worked at DefenseWeb. My current music collection is around 45gb, so that seemed like a good solution.

The problem is that the iPod, while mounting like a normal USB drive, uses a messed up, proprietary method of storing music. Finding a way to interact with the iPod's music database in my language of choice (C#) proved difficult.

Enter Rockbox. Rockbox is alternative firmware for many portable music players, including the Ipod. Most importantly, it stores music as a simple, straightforward filesystem. This allows for easy synchronization of music using my custom software, and easy playback directly on the device, or using the device as a USB filesystem.

Rockbox proved very easy to install. After some initial frustration with the automated installer (don't use it), I quickly installed it manually. The default look is pretty nasty, but there are lots of themes available. I'm currently using the "Black Glass AA" theme, which displays album art if you have it (you simple need to put 100x100 "cover.bmp" files in each album directory).

Tuesday, November 13, 2007

3D Landscape Rendering With Texture Splatting


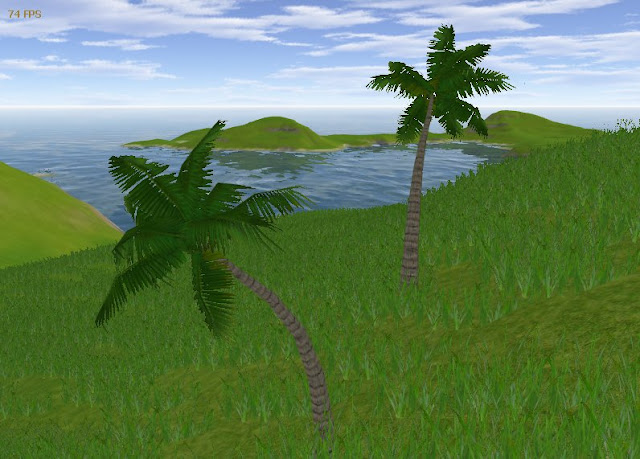
The above image is from a project I'm working on at the moment. It took a bit of research and trial and error to get to this point, so I thought I would take a moment to share some of what I've learned along the way.

One of the key elements of many types of 3D games is rendering realistic-looking landscapes, and one of the key elements of rendering a realistic-looking landscape is being able to texture the landscape so it looks good both at a distance and up close, all without completely killing the framerate. A technique known as texture splatting allows us to do just that.

But first, a few landscape basics. A rendered landscape has two basic elements -- an elevation, or height map and texturing. The information for both of these can be generated by a landscape generation program. The one I use is a fantastic program called L3DT. It uses all sorts of fancy techniques to generate realistic looking terrain, and can output a number of useful data files that can be used inside a 3D engine to display the landscape.

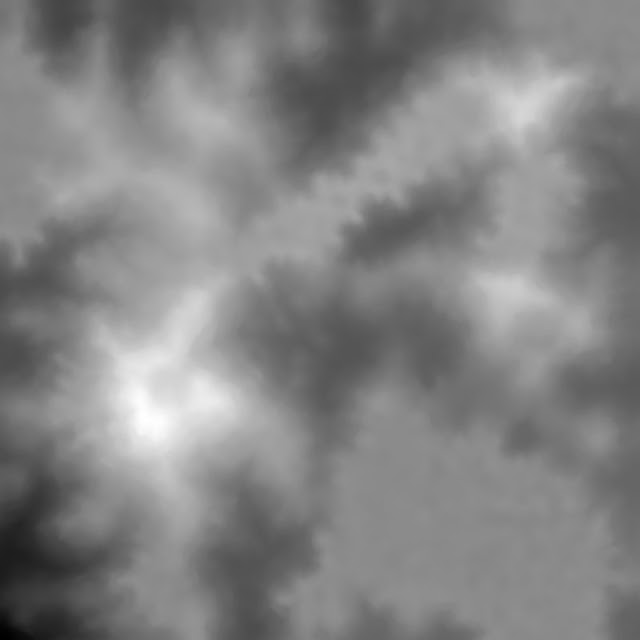
First, the height map. This is generally exported as a grayscale image, with lighter areas being higher in elevation. Here is an example:


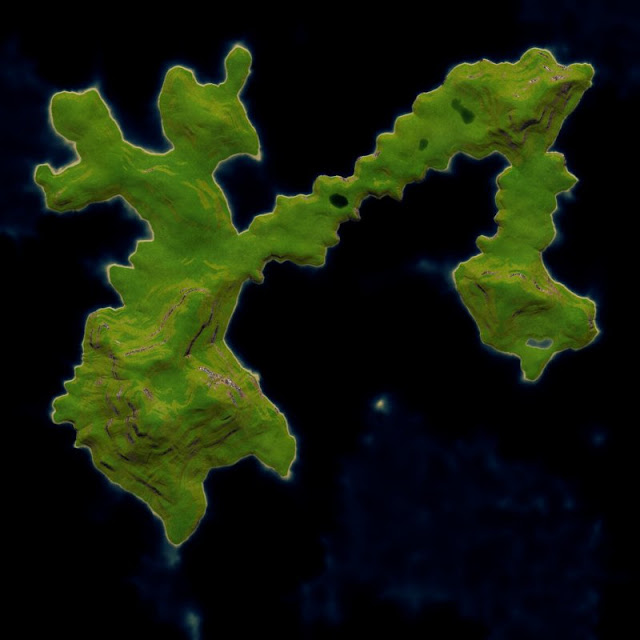
L3DT can also generate a corresponding texture image that represents the type of the terrain and also bakes in lighting information:


Using just these two images, we can already generate a pretty decent 3D visualization of the landscape. All we do is create a terrain mesh based on the height map and stretch the texture image completely over it. The result is something like this:
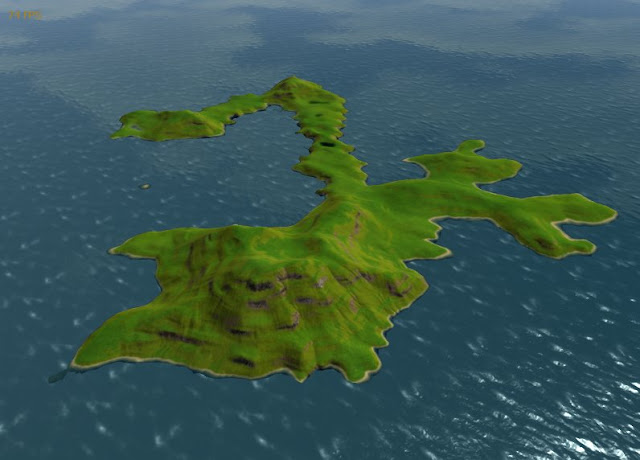


Looks pretty good, right? Well, there is a problem. It looks good at a distance because we are seeing the texture image at roughly it's actual resolution. When we render up close it is a different story altogether:
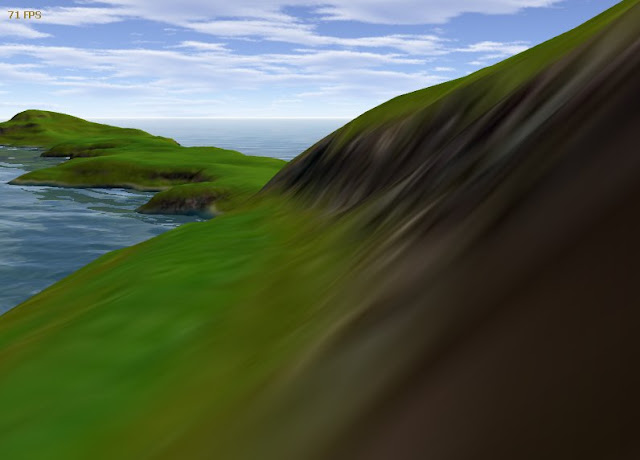


Not so hot. The texture image just doesn't have enough resolution to show detail up close. We could increase the resolution of the texture, but that quickly breaks down -- it simply takes too much memory in the graphics card.

This is where texture splatting comes in. What we want to do is supplement the high-level texture with some low-level details. To do this, we render some number of tiled-texture detail layers on top of the high-level texture. Each detail layer alpha-blended with the rest using an alpha map that represents the "amount" of the detail texture at any given point on the landscape. As a simple example, lets say that we have two detail textures -- grass and rock. Here are the two alpha maps, one for each, that can be used to control the texture splatting, along with an example subregion of the grass and rock detail textures I am using:


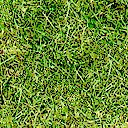
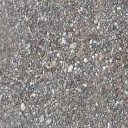
In the alpha maps, lighter areas mean more of the texture, with white being solid and black being fully transparent. These simple alpha maps will result in a landscape that is half grass and half rock, with a transition in the middle. If we use these alpha maps and apply them to our height map from earlier, we get this:
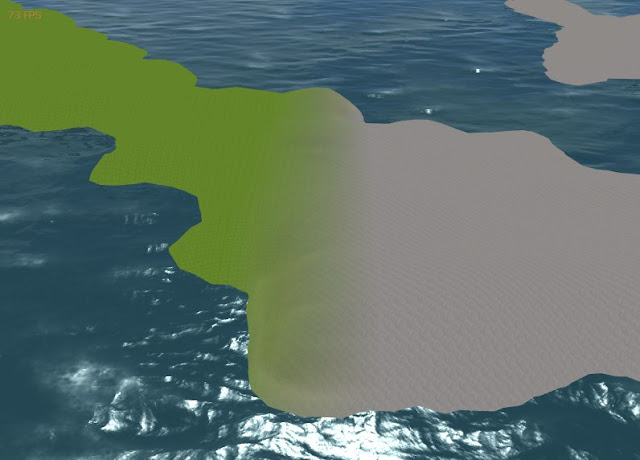


Kind of silly looking, but I hope it serves as a good example to understand how the alpha maps determine how the textures are rendered on the landscape.

For a real example, however, we will want alpha maps that match our landscape texture. Fortunately, L3DT can export these as well. For each terrain type L3DT is using to generate the landscape, it can export an alpha map that represents the density of that kind of terrain. For example, here is the grass density map it generates:
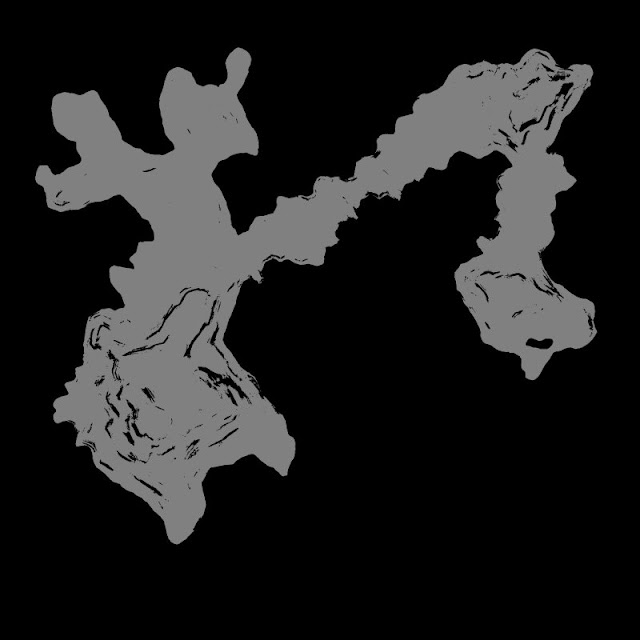


As you can see, we have grass all over the island area except for certain steep sections that contain rock. One thing to note here is that I have slightly modified the alpha map L3DT produces by taking the brightness down by about a quarter. This is so that we will still be able to see the high-level texture under the splatting layer.

Here is the result with splatting. I am using three splatting layers -- grass, rock and sand (which you can see a bit on the shore).
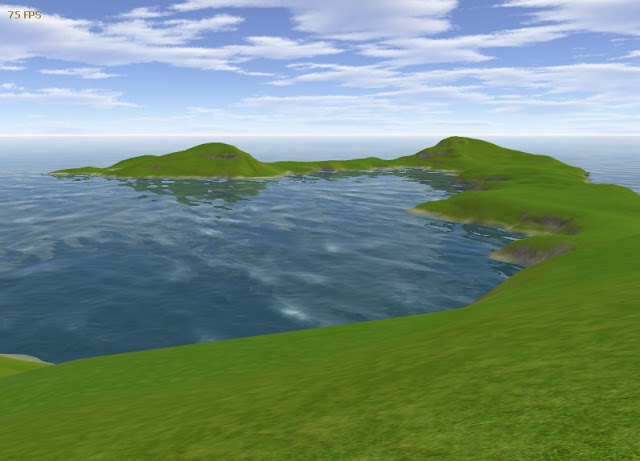


As you can see, we have nice details up close, while still retaining the color variation and shadowing from the high-level texture. By using the high-level texture as a base, you can often get by with just a few splatting layers. They only need to be used to highlight textural differences, not color differences since the color variation is provided by the high-level texture base. Here is an example of this:
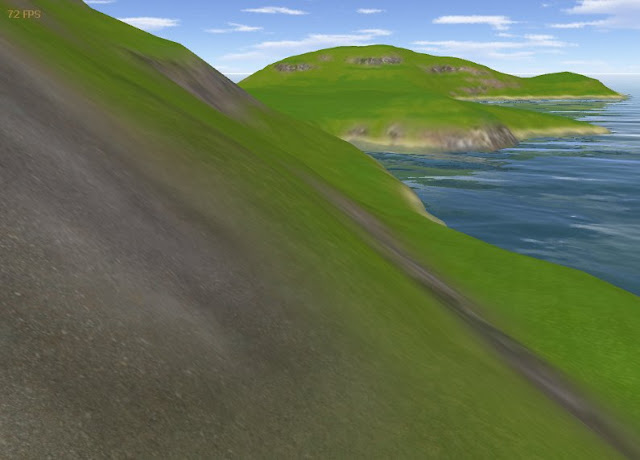


You can see the rock texture blend into the grass texture. This is caused by the alpha maps. The variation in lightness within the rock area, however, just comes from color variation in the high-level texture base.

That's it. Hopefully this helped to explain what texture splatting is, why it is useful and how you use it.

Some additional notes:
  • How to actually *do* the splatting: Your best bet is to use an engine that supports it. I use Truevision3d. Failing that, you'll need to implement a splatting shader yourself that blends the base texture with the splatting layers while tiling the detail textures.
  • Notes on detail textures: Use high-contrast textures with a lot of fine detail. Avoid textures with high-level variation in them or you will see tiling patterns on your landscape.
  • About the water: The water in the pictures uses a modified version of Zak's Ocean Shader. Thanks, Zak!
  • About the sky: It is a skybox rendered with Terragen.
  • About the trees and grass in the first picture: The trees are just individual meshes. The grass is billboarded (rectangular textures that are rotated to always face the camera) using a custom groundcover system.
  • How to use splatting in Truevision3d: I'll write up an example soon.

Monday, August 20, 2007

Using Project Resources in WPF

For a project I am working on, I have a directory full of icons that I use. I had been loading them from a fixed path on disk, but I wanted to make my application more portable so I decided to turn them into project resources.

To to this, you first create a folder in your project to store your resources. You can put them in the project root, but that gets cluttered. In my case, I created a new folder in my project called 'Icons'. Next, add your image files to the new folder. You can copy them directly to the folder and then import them into the project by using 'Add Existing Item'.

Once added, check the Properties of your images to ensure they have a Build Action of 'Resource' (they should be by default -- at least that is the behavior I get with Visual Studio 2008). Now when you build your project they will be compiled directly into the executable.

Referencing the embedded resources to create WPF images is simple. From XAML, you simply specify the relative path to the resource as your Image Source:

<Image Source="Icons/MyImage.png" />


From code, you specify the path as a relative URI:

Image myImage = new Image();
myImage.Source = new BitmapImage(new Uri("Icons/MyImage.png", UriKind.Relative));

Monday, July 16, 2007

A TV3D ArcBall implementation

A common need in 3D applications is the ability to rotate an object with the mouse. One of the most natural ways to implement this is to imagine that there is a sphere centered on the object, and that you are grabbing a point on the sphere and rotating it. The canonical example of this "ArcBall" technique is the implementation by Ken Shoemake in Graphics Gems IV, but many other versions are floating around the Net. I needed a C# implementation for TV3D, so I rolled my own. It is most closely based on a WPF implementation by Daniel Lehenbauer (check the link for a nice overview of the theory behind the implementation).

My version is a pretty direct translation, with one nice improvement. Instead of doing a delta each mouse move from the previous mouse movement, I always do a delta from the beginning of the mouse drag. I found that without this modification, floating point rounding error caused obvious visual problems. Always computing a delta from the start of the mouse drag ensures complete consistency during the drag.

The ArcBall class follows, but first here is an example of how to use it. At some point during your application initialization, create an instance of the ArcBall class like this:

ArcBall myArcBall = new ArcBall(windowWidth, windowHeight, mathLibrary);


where 'windowWidth' and 'windowHeight' are the width and height of your display window, and 'mathLibrary' is a instance of the TVMathLibrary class.

Then, in your game loop where you are checking mouse input, do something like the following:

InputEngine.GetAbsMouseState(ref mouseX, ref mouseY, ref mouseB1, ref mouseB2, ref mouseB3);

if (mouseB2)
{
if (mouseDragging)
{
TV_3DQUATERNION result = new TV_3DQUATERNION();

myArcBall.Update(new TV_2DVECTOR((float)mouseX, (float)mouseY), ref result);

myMesh.SetQuaternion(result);
}
else
{
if (selectedObject != null)
{
myArcBall.StartDrag(new TV_2DVECTOR((float)mouseX, (float)mouseY), myMesh.GetQuaternion());

mouseDragging = true;
}
}
}
else
{
mouseDragging = false;
}


This code starts a drag when the mouse button (in this case, mouse button 2) is pressed. It initializes the ArcBall with the initial mouse position and the initial quaternion of the mesh we want to rotate. While the mouse button is down, it updates the ArcBall with the current mouse position and gets the resulting quaternion. This is then applied to the mesh to get the desired rotation.

Here is the code for the ArcBall class:

class ArcBall
{
private TV_2DVECTOR startPoint;
private TV_3DVECTOR startVector = new TV_3DVECTOR(0.0f, 0.0f, 1.0f);
private TV_3DQUATERNION startRotation;
private float width, height;
private TVMathLibrary mathLib;

/// <summary>
/// ArcBall Constructor
/// </summary>
/// <param name="width">The width of your display window</param>
/// <param name="height">The height of your display window</param>
/// <param name="mathLib">An instance of the TV3D math library</param>
public ArcBall(float width, float height, TVMathLibrary mathLib)
{
this.width = width;
this.height = height;

this.mathLib = mathLib;
}

/// <summary>
/// Begin dragging
/// </summary>
/// <param name="startPoint">The X/Y position in your window at the beginning of dragging</param>
/// <param name="rotation"></param>
public void StartDrag(TV_2DVECTOR startPoint, TV_3DQUATERNION rotation)
{
this.startPoint = startPoint;
this.startVector = MapToSphere(startPoint);
this.startRotation = rotation;
}

/// <summary>
/// Get an updated rotation based on the current mouse position
/// </summary>
/// <param name="currentPoint">The curren X/Y position of the mouse</param>
/// <param name="result">The resulting quaternion to use to rotate your object</param>
public void Update(TV_2DVECTOR currentPoint, ref TV_3DQUATERNION result)
{
TV_3DVECTOR currentVector = MapToSphere(currentPoint);

TV_3DVECTOR axis = mathLib.VCrossProduct(startVector, currentVector);

float angle = mathLib.VDotProduct(startVector, currentVector);

TV_3DQUATERNION delta = new TV_3DQUATERNION(axis.x, axis.y, axis.z, -angle);

mathLib.TVQuaternionMultiply(ref result, startRotation, delta);
}

/// <summary>
/// Map a point in window space to our arc ball sphere
/// </summary>
/// <param name="point">The X/Y position to map</param>
/// <returns>The 3D position on the sphere</returns>
private TV_3DVECTOR MapToSphere(TV_2DVECTOR point)
{
float x = point.x / (width / 2.0f);
float y = point.y / (height / 2.0f);

x = x - 1.0f;
y = 1.0f - y;

float z2 = 1.0f - x * x - y * y;
float z = z2 > 0.0f ? (float)Math.Sqrt((double)z2) : 0;

TV_3DVECTOR outVec = new TV_3DVECTOR();

mathLib.TVVec3Normalize(ref outVec, new TV_3DVECTOR(x, y, z));

return outVec;
}
}

Thursday, July 12, 2007

WPF Text Woes

WPF text rendering currently has a complete show-stopper of a problem. I'm not talking about the general "blurriness" of text. That's just anti-aliasing, and while I personally prefer small text to be aliased, I can live with it.

The problem that is driving me mad is the behavior of text when it scrolls. After scrolling stops, sections of the text will slowly adjust focus over a period of a second or two. At first, I thought the issue was just eyestrain on my part, but it really is doing it. It is very uncomfortable to look at, and in my opinion makes WPF useless in text-heavy applications until Microsoft finds a way to fix it.

Other people have noticed the issue as well. This post sheds some light on the issue, and implies that it was a conscious design decision.

There has to be a better way...